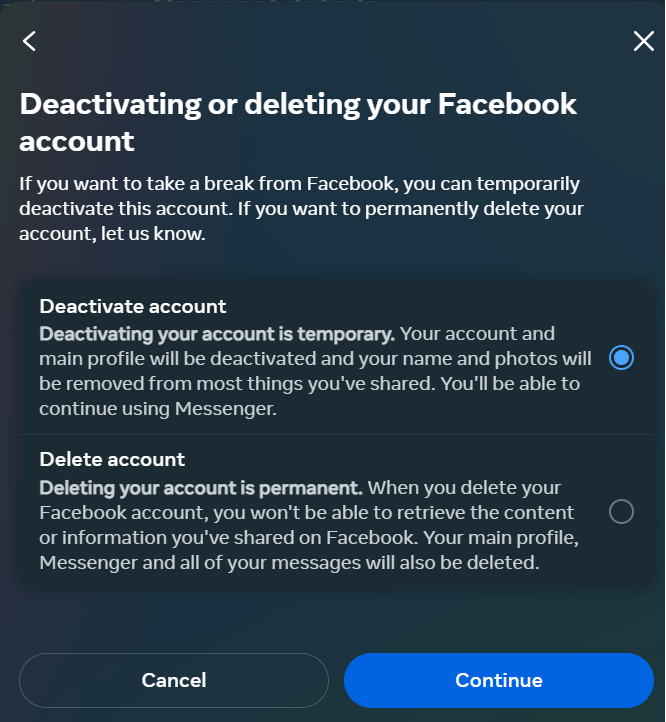
Knowing how to deactivate or delete a Facebook account is important if you want to limit your social media exposure, either temporarily or permanently.
In this blog post we explain the difference between deactivation and deletion, what steps to take, and some important things to remember.
Deactivation vs Deletion
Deactivating an account on Facebook will remove it temporarily. The user’s profile data will be restored if the user decides to reactivate the account later. This is useful for taking a break from Facebook.

A deactivated account can be set to automatically reactivate within a preset time frame.
To reactivate an account manually, simply log back into it. Any deactivation will be eliminated.

Deleting an account on Facebook will permanently remove all of the data. Facebook stops showing the account immediately, but does not delete the data for 30 days. This allows users 30 days to log back in and cancel the account deletion. Once the 30 days expires the profile is gone forever along with friend lists, photos and Facebook history.

Since deletion is permanent, users should check out the Facebook Support Page for a better understanding before undertaking this step.
How to navigate to the options
Facebook is constantly changing their interface, including where their options are located.
At the time of writing, the ability to deactivate, and delete an account is within the Accounts Center.
To get there:
- open Settings
- click on See more in the Accounts Center
- choose Personal details
- click on the Account ownership and control section.


Once there, users will find the options for deactivation and deletion. Before you delete a Facebook account, you might want to save your photos and other data stored there. This article is Facebook’s instructions for saving your data. We can help with that too.
If you have specific questions about how to deactivate or delete a Facebook Account, or if our terminology isn’t clear, please use our contact form to send us a message. Thank you!

